236 lines
3.6 KiB
Markdown
236 lines
3.6 KiB
Markdown
### Centos 搭建activemq
|
||
|
||
|
||
|
||
### 软件版本
|
||
|
||
centos 7
|
||
|
||
openJDK 8
|
||
|
||
activeMQ 5.16.5
|
||
|
||
### 配置jdk8
|
||
|
||
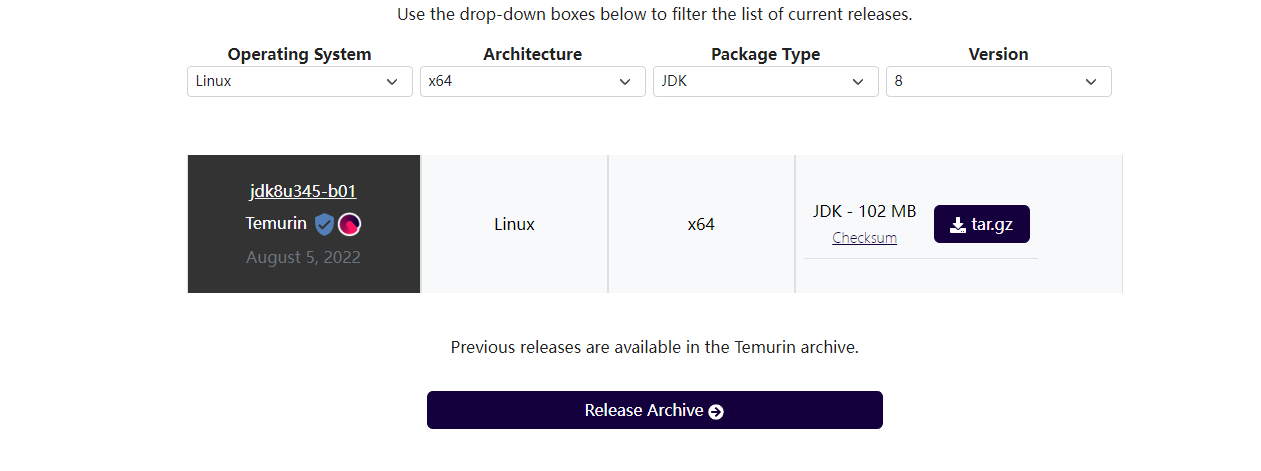
下载 JDK 8 这里选用openJDK8
|
||
|
||
下载地址 :[Latest releases | Adoptium](https://adoptium.net/temurin/releases/?version=8)
|
||
|
||
|
||
|
||
|
||
|
||
|
||
|
||
下载后 上传到linux 服务器
|
||
|
||
|
||
|
||

|
||
|
||
|
||
|
||
解压
|
||
|
||
```
|
||
tar -zxvf OpenJDK8U-jdk_x64_linux_hotspot_8u345b01.tar.gz`
|
||
|
||
mv jdk8u345-b01 /opt/
|
||
```
|
||
|
||
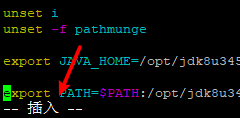
#配置path
|
||
`vim vim /etc/profile`
|
||
|
||
#按下 `insert` 键 进入编辑模式
|
||
|
||
|
||
|
||
#文档最后追加
|
||
|
||
export JAVA_HOME=/opt/jdk8u345-b01
|
||
export PATH=$PATH:/opt/jdk8u345-b01/bin
|
||
|
||
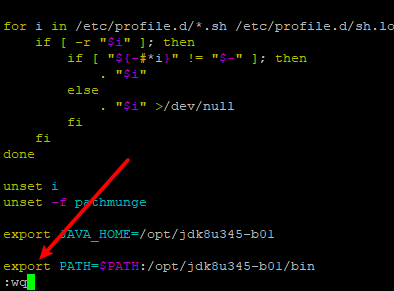
#保存更改 并退出
|
||
|
||
按一下 `esc` 再输入`:wq` 保存退出
|
||
|
||
|
||
|
||
|
||
|
||
|
||
|
||
刷新配置
|
||
|
||
` source /etc/profile`
|
||
|
||
|
||
|
||
|
||
|
||
验证JAVA
|
||
|
||
`java version`
|
||
|
||

|
||
|
||
|
||
|
||
|
||
|
||
## 安装 activemq
|
||
|
||
|
||
|
||
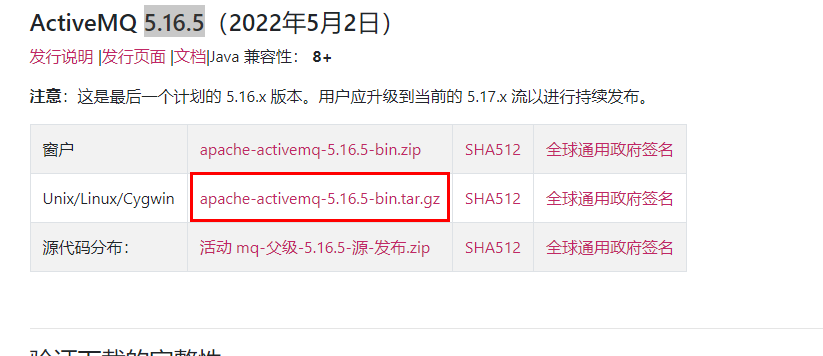
下载activemq
|
||
|
||
|
||
|
||
下载地址 [活动MQ (apache.org)](https://activemq.apache.org/components/classic/download/)
|
||
|
||
上传到服务器
|
||
|
||

|
||
|
||
|
||
|
||
解压
|
||
|
||
```
|
||
tar -zxvf apache-activemq-5.16.5-bin.tar.gz`
|
||
|
||
mv apache-activemq-5.16.5 /opt/
|
||
|
||
```
|
||
|
||
编辑配置文件
|
||
|
||
|
||
|
||
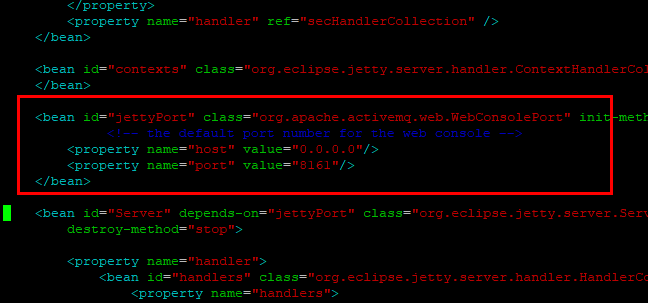
`vim /opt/apache-activemq-5.16.5/conf/jetty.xml`
|
||
|
||
|
||
|
||
按下 insert 键 进入编辑模式
|
||
|
||
找到如下配置 将`127.0.0.1` 修改为`0.0.0.0`
|
||
|
||
|
||
|
||
|
||
|
||
按一下 `esc` 再输入`:wq` 保存退出
|
||
|
||
|
||
|
||
### 创建系统服务
|
||
|
||
|
||
|
||
`sudo vi /usr/lib/systemd/system/activemq.service`
|
||
|
||
输入一下内容
|
||
|
||
```
|
||
[Unit]
|
||
Description=activemq message queue
|
||
After=network.target
|
||
[Service]
|
||
PIDFile=/opt/apache-activemq-5.16.5/data/activemq.pid
|
||
ExecStart=/opt/apache-activemq-5.16.5/bin/activemq start
|
||
ExecStop=/opt/apache-activemq-5.16.5/bin/activemq stop
|
||
User=root
|
||
Group=root
|
||
Restart=always
|
||
RestartSec=9
|
||
StandardOutput=syslog
|
||
StandardError=syslog
|
||
SyslogIdentifier=activemq
|
||
|
||
[Install]
|
||
WantedBy=multi-user.target
|
||
```
|
||
|
||
|
||
|
||
刷新配置文件
|
||
|
||
`systemctl reload`
|
||
|
||
启动服务
|
||
|
||
`systemctl start activemq`
|
||
|
||
查看状态
|
||
|
||
systemctl status activemq
|
||
|
||
|
||
|
||
|
||
|
||
|
||
|
||
### 更改用户账号
|
||
|
||
#### admin ui
|
||
|
||
在 mq安装目录/conf/jetty.xml中
|
||
|
||
```
|
||
<bean id="securityConstraint" class="org.eclipse.jetty.util.security.Constraint">
|
||
<property name="name" value="BASIC" />
|
||
<property name="roles" value="admin" />
|
||
<property name="authenticate" value="true" />
|
||
</bean>
|
||
```
|
||
|
||
|
||
|
||
|
||
|
||
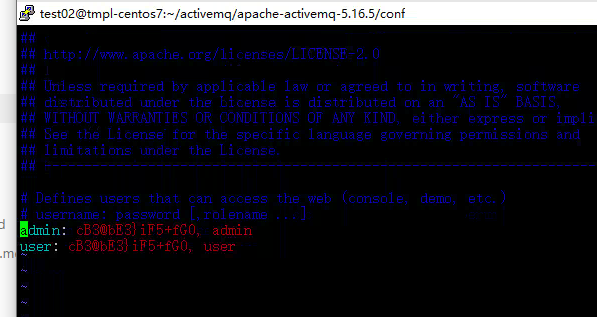
在 mq安装目录/conf/jetty-realm.properties中,
|
||
|
||
username: password [,rolename ...]
|
||
|
||
admin: password,admin
|
||
|
||
帐号:admin,
|
||
|
||
密码:password
|
||
|
||
用户:admin (就是刚刚jetty.xml设定的roles)
|
||
|
||
|
||
|
||
#### 连接账号密码
|
||
|
||
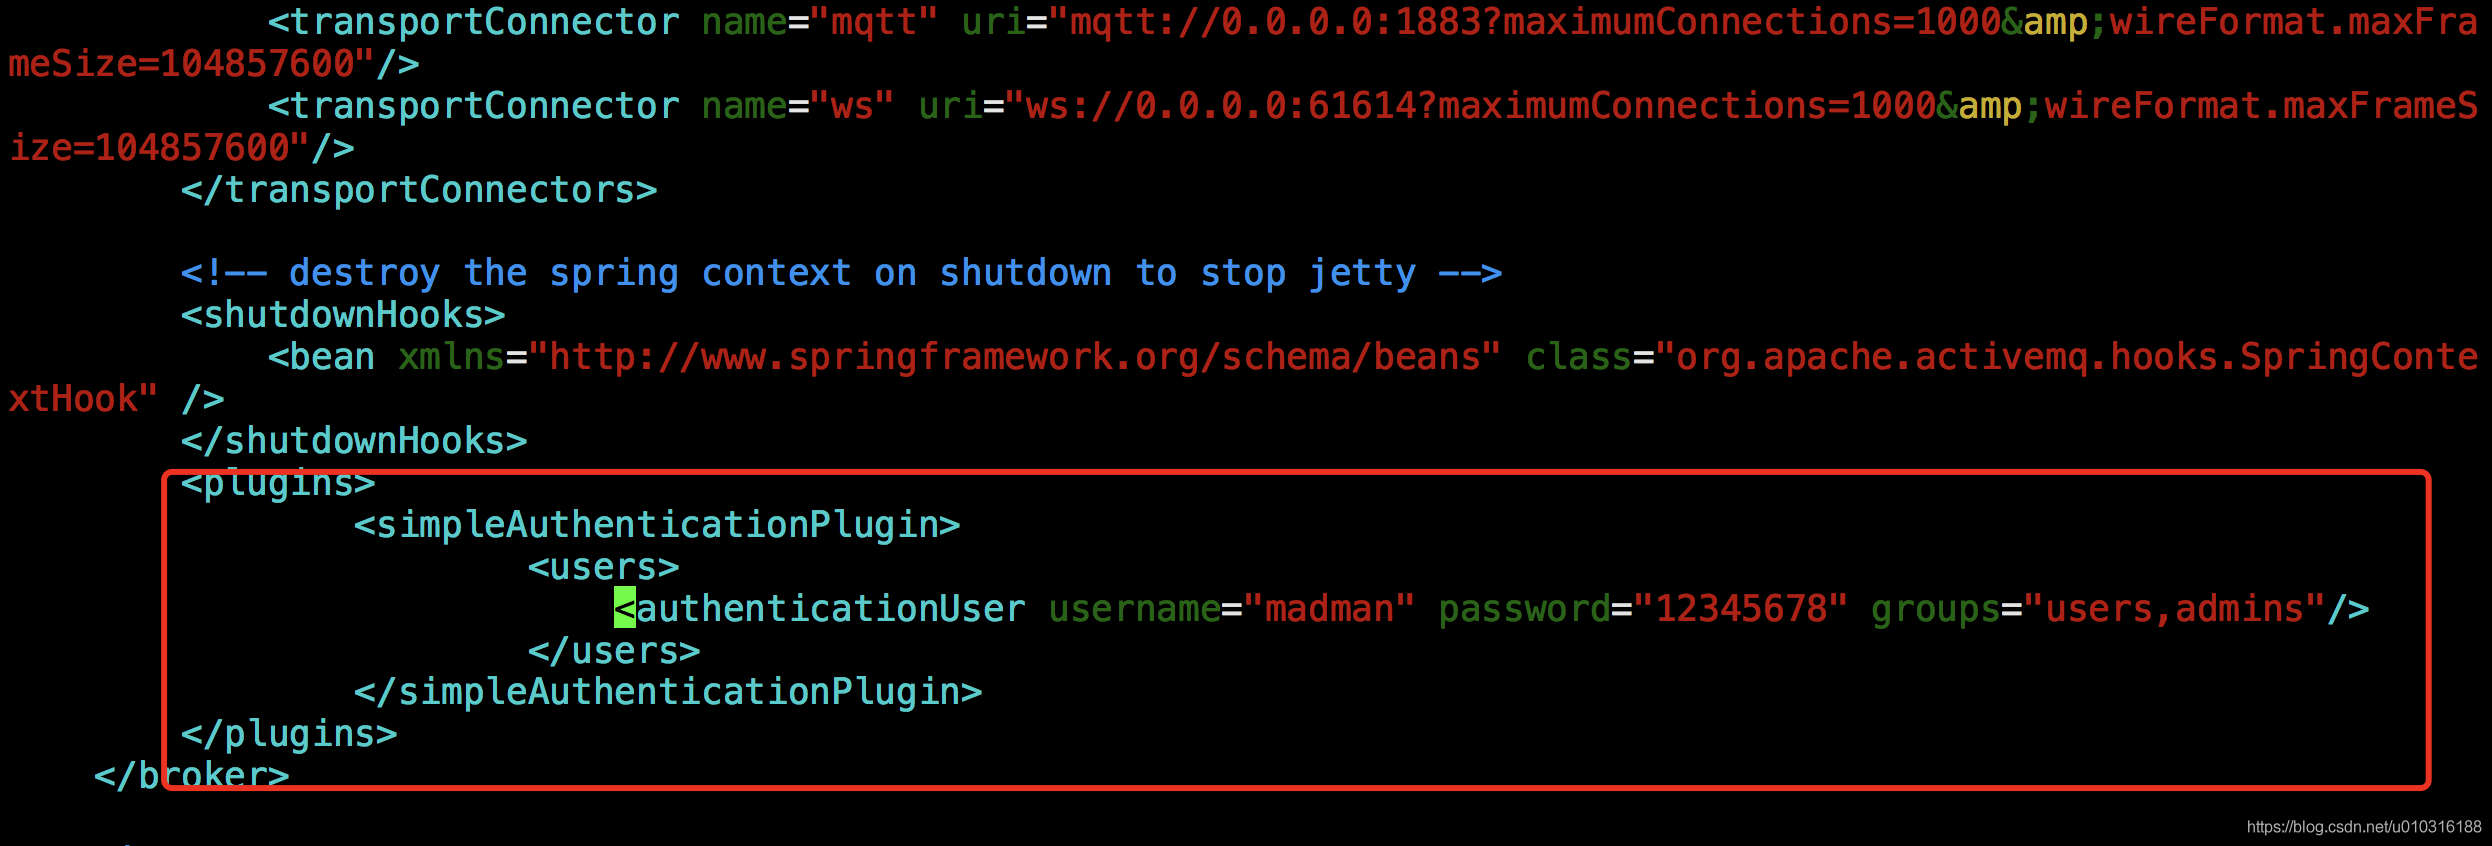
在ActiveMQ的conf目录的activemq.[xml](https://so.csdn.net/so/search?q=xml&spm=1001.2101.3001.7020)中添加账号密码
|
||
|
||
```xml
|
||
<plugins>
|
||
<simpleAuthenticationPlugin>
|
||
<users>
|
||
<authenticationUser username="admin" password="cB3@bE3}iF5+fG0" groups="users,admins"/>
|
||
</users>
|
||
</simpleAuthenticationPlugin>
|
||
</plugins>
|
||
```
|
||
|
||
|
||
|
||
|
||
|
||
|
||
|
||
|
||
|
||
#### 设置控制台 连接账号密码
|
||
|
||

|
||
|
||
|
||
|
||
访问控制台 iP:8161
|
||
|
||
admin/admin |