12 KiB
12 KiB
debian 11 安装 编译nginx
安装编译环境
    #GCC
    apt install -y build-essential

    #安装正则库
    apt install -y libpcre3 libpcre3-dev

    #安装zlib库
    apt install -y zlib1g-dev

    #openssl
    apt install -y openssl libssl-dev
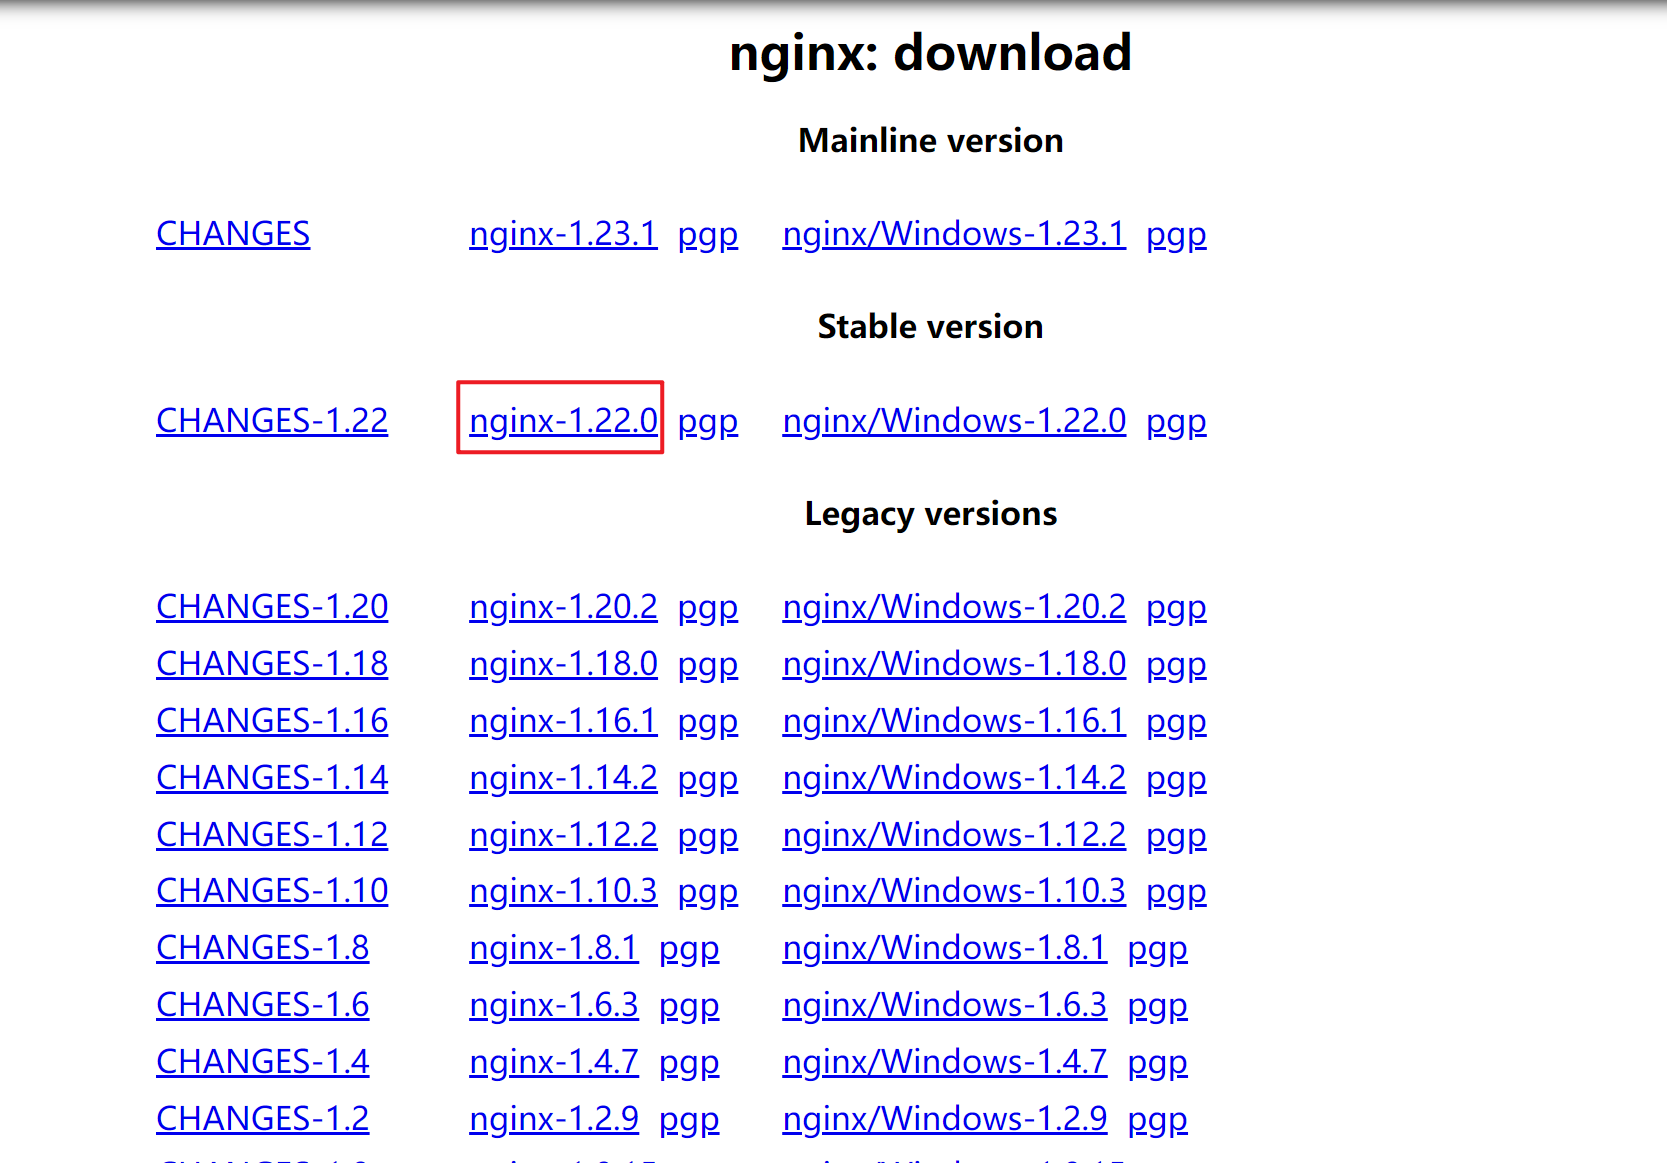
下载源码
官网 https://nginx.org/en/download.html
这里以 nginx-1.20.2 版本为例
https://nginx.org/download/nginx-1.22.0.tar.gz
解压源码
    cd /opt/

    wget https://nginx.org/download/nginx-1.22.0.tar.gz

    tar -zxvf nginx-1.22.2.tar.gz

    cd nginx-1.22.2/
配置编译参数模块
指定安装路径 --prefix=/usr/local/nginx
执行用户、组 可以不加,如果系统中没有 该用户会报错
--user=www
--group=www \
    ./configure \
    --prefix=/usr/local/nginx \
    --user=www \
    --group=www \
    --sbin-path=/usr/local/nginx/sbin/nginx \
    --conf-path=/usr/local/nginx/nginx.conf \
    --error-log-path=/var/log/nginx/error.log \
    --http-log-path=/var/log/nginx/access.log \
    --pid-path=/var/run/nginx.pid \
    --lock-path=/var/run/nginx.lock \
    --http-client-body-temp-path=/var/cache/nginx/client_temp \
    --http-proxy-temp-path=/var/cache/nginx/proxy_temp \
    --http-fastcgi-temp-path=/var/cache/nginx/fastcgi_temp \
    --http-uwsgi-temp-path=/var/cache/nginx/uwsgi_temp \
    --http-scgi-temp-path=/var/cache/nginx/scgi_temp \
    --with-file-aio \
    --with-threads \
    --with-http_addition_module \
    --with-http_auth_request_module \
    --with-http_dav_module \
    --with-http_flv_module \
    --with-http_gunzip_module \
    --with-http_gzip_static_module \
    --with-http_mp4_module \
    --with-http_random_index_module \
    --with-http_realip_module \
    --with-http_secure_link_module \
    --with-http_slice_module \
    --with-http_ssl_module \
    --with-http_stub_status_module \
    --with-http_sub_module \
    --with-http_v2_module \
    --with-mail \
    --with-mail_ssl_module \
    --with-stream \
    --with-stream_realip_module \
    --with-stream_ssl_module \
    --with-stream_ssl_preread_module
编译 and 安装 nginx
    make

    make  install
静态编译
在运行 make之前
修改objs/Makefile文件, 搜索link关键字, 在 link objs/nginx 的时候补充上 -static参数静态编译
objs/ngx_modules.o -static \
创建进程守护
    vim /usr/lib/systemd/system/nginx.service


    [Unit]
    Description=nginx
    After=network.target

    [Service]
    Type=forking
    ExecStart=/usr/local/nginx/sbin/nginx
    ExecReload=/usr/local/nginx/sbin/nginx -s reload
    ExecStop=/usr/local/nginx/sbin/nginx -s quit
    PrivateTmp=true

    [Install]
    WantedBy=multi-user.target
验证安装
curl 127.0.0.1
配置nginx.conf
加到 http 节点中
  		include       mime.types;
        default_type  application/octet-stream;

        server_names_hash_bucket_size 512;
        client_header_buffer_size 32k;
        large_client_header_buffers 4 32k;
        client_max_body_size 50m;

        sendfile   on;
        tcp_nopush on;

        keepalive_timeout 60;

        tcp_nodelay on;

        fastcgi_connect_timeout 300;
        fastcgi_send_timeout 300;
        fastcgi_read_timeout 300;
        fastcgi_buffer_size 64k;
        fastcgi_buffers 4 64k;
        fastcgi_busy_buffers_size 128k;
        fastcgi_temp_file_write_size 256k;
		fastcgi_intercept_errors on;

        gzip on;
        gzip_min_length  1k;
        gzip_buffers     4 16k;
        gzip_http_version 1.1;
        gzip_comp_level 2;
        gzip_types     text/plain application/javascript application/x-javascript text/javascript text/css application/xml;
        gzip_vary on;
        gzip_proxied   expired no-cache no-store private auth;
        gzip_disable   "MSIE [1-6]\.";

        limit_conn_zone $binary_remote_addr zone=perip:10m;
		limit_conn_zone $server_name zone=perserver:10m;

        server_tokens off;
        access_log off;
分离配置文件
将每个网站单独一个配置 ,在nginx中全局加载
在/etc/ 目录中创建 nginx 文件夹用来储存 配置
    mkdir /etc/nginx/site-enable -p

    mkdir /etc/nginx/tcp-enable

    cd /etc/nginx/site-enable

    vim site.conf
具体使用
如果你是按我的方法编译,那么,需要注意。
/usr/local/nginx:为Nginx编译安装的地址。/usr/local/nginx/nginx.conf:Nginx默认配置文件。
同时,我们使用systemctl对Nginx进行管理:
systemctl start nginx:启动Nginx服务。systemctl reload nginx:Nginx配置重载。systemctl stop nginx:停止Nginx服务。
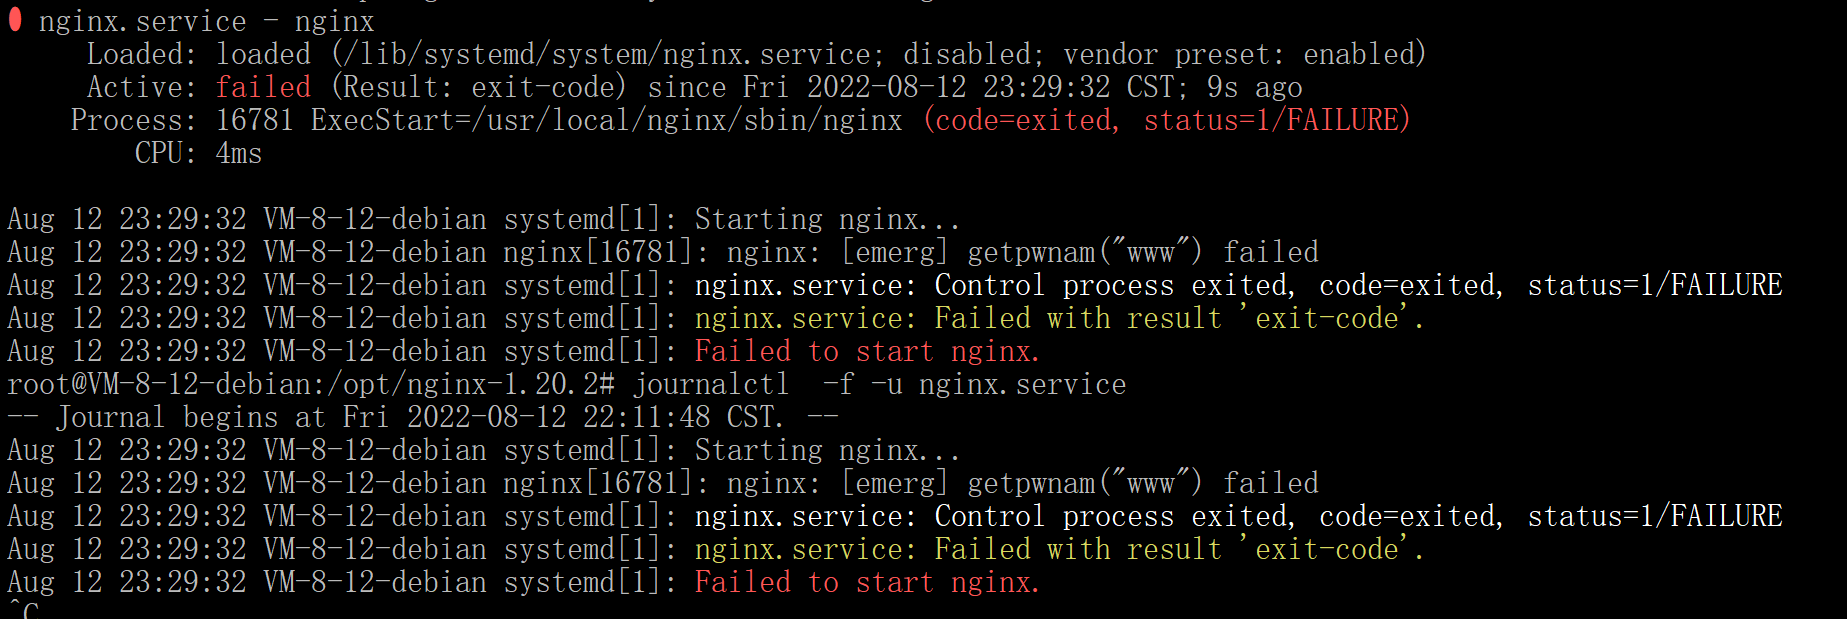
常见问题
没有用户
目录创建失败(多级目录)

附1: systemctl 操作
    #重载配置文件  添加新的 或者修改都要重载。
    systemctl daemon-reload

    #启动Nginx服务
    systemctl start nginx

    #Nginx配置重载。
    systemctl reload nginx

    #停止Nginx服务。
    systemctl stop nginx

    #重启nginx
    systemctl restart nginx

    # 停止nginx服务开机自启动
    systemctl disable nginx.service
附2: journalctl操作
    #追踪日志
    journalctl  -f -u nginx.service

    #读日志
    journalctl  -r -u nginx.service
附3: linux 创建用户
    #创建用户组
    groupadd www

    #创建用户
    useradd www -g www
    adduser 用户名
useradd与adduser 差异
命令使用方法
    useradd 用户名

    adduser 用户名
命令差异总结
在Ubuntu下useradd与adduser命令不同
-
useradd在使用该命令创建用户是不会在/home下自动创建与用户名同名的用户目录,而且不会自动选择shell版本,也没有设置密码,那么这个用户是不能登录的,需要使用passwd命令修改密码。
-
adduser在使用该命令创建用户是会在/home下自动创建与用户名同名的用户目录,选择系统shell版本,会在创建时会提示输入密码,更加友好。
在CentOS下useradd与adduser命令相同
- useradd 和 adduser都会在/home下自动创建与用户名同名的用户目录,但是没有提示输入密码,需要使用passwd手动设置一下!
passwd 用户名; #为用户设置密码
附4: 完整的nginx 配置文件
apt 卸载nginx
查询 nginx 相关软件

dpkg --get-selections|grep nginx

卸载nginx(删除配置)
apt-get --purge remove nginx
附5: 完整的nginx 配置文件
nginx.conf
worker_processes auto;

worker_rlimit_nofile 51200;

stream {
    log_format tcp_format '$time_local|$remote_addr|$protocol|$status|$bytes_sent|$bytes_received|$session_time|$upstream_addr|$upstream_bytes_sent|$upstream_bytes_received|$upstream_connect_time';

    access_log /var/log/nginx/tcp-access.log tcp_format;
    error_log /var/log/nginx/tcp-error.log;

    include /etc/nginx/tcp-enable/*.conf;
}


events {
    use epoll;
    worker_connections 51200;
    multi_accept on;
}


http {
    include mime.types;
    default_type application/octet-stream;

    server_names_hash_bucket_size 512;
    client_header_buffer_size 32k;
    large_client_header_buffers 4 32k;
    client_max_body_size 50m;

    sendfile on;
    tcp_nopush on;

    keepalive_timeout 60;

    tcp_nodelay on;

    fastcgi_connect_timeout 300;
    fastcgi_send_timeout 300;
    fastcgi_read_timeout 300;
    fastcgi_buffer_size 64k;
    fastcgi_buffers 4 64k;
    fastcgi_busy_buffers_size 128k;
    fastcgi_temp_file_write_size 256k;
    fastcgi_intercept_errors on;

    gzip on;
    gzip_min_length 1k;
    gzip_buffers 4 16k;
    gzip_http_version 1.1;
    gzip_comp_level 2;
    gzip_types text/plain application/javascript application/x-javascript text/javascript text/css application/xml;
    gzip_vary on;
    gzip_proxied expired no-cache no-store private auth;
    gzip_disable "MSIE [1-6]\.";

    limit_conn_zone $binary_remote_addr zone=perip:10m;
    limit_conn_zone $server_name zone=perserver:10m;

    server_tokens off;
    access_log off;

    include /etc/nginx/site-enable/*.conf;
}
web-site.conf
server {
    listen 80;
    server_name frp.plugin.dr1997.com;
    index index.php index.html index.htm default.php default.htm default.html;
    root /www/wwwroot/frp.plugin.dr1997.com;

    #禁止访问的文件或目录
    location ~ ^/(\.user.ini|\.htaccess|\.git|\.svn|\.project|LICENSE|README.md)
    {
        return 404;
    }

    #一键申请SSL证书验证目录相关设置
    location ~ \.well-known{
        allow all;
    }

    access_log  /www/wwwlogs/frp.plugin.dr1997.com.log;
    error_log  /www/wwwlogs/frp.plugin.dr1997.com.error.log;
}
ssl
server {
    listen 80;
	listen 443 ssl http2;
    server_name frp.dr1997.com *.frp.dr1997.com;
    index index.php index.html index.htm default.php default.htm default.html;
    root /www/wwwroot/frp.dr1997.com;

    #SSL-START SSL相关配置,请勿删除或修改下一行带注释的404规则
    #error_page 404/404.html;
    #HTTP_TO_HTTPS_START
    if ($server_port !~ 443){
        rewrite ^(/.*)$ https://$host$1 permanent;
    }
    #HTTP_TO_HTTPS_END
    ssl_certificate    /www/server/panel/vhost/cert/frp.dr1997.com/fullchain.pem;
    ssl_certificate_key    /www/server/panel/vhost/cert/frp.dr1997.com/privkey.pem;
    ssl_protocols TLSv1.1 TLSv1.2 TLSv1.3;
    ssl_ciphers EECDH+CHACHA20:EECDH+CHACHA20-draft:EECDH+AES128:RSA+AES128:EECDH+AES256:RSA+AES256:EECDH+3DES:RSA+3DES:!MD5;
    ssl_prefer_server_ciphers on;
    ssl_session_cache shared:SSL:10m;
    ssl_session_timeout 10m;
    add_header Strict-Transport-Security "max-age=31536000";
    error_page 497  https://$host$request_uri;

    #SSL-END


    #一键申请SSL证书验证目录相关设置
    location ~ \.well-known{
        allow all;
    }

    access_log  /www/wwwlogs/frp.dr1997.com.log;
    error_log  /www/wwwlogs/frp.dr1997.com.error.log;
}
反向代理(http)
    server {
        listen 80;
        listen 443 ssl http2;
        server_name frp.dr1997.com *.frp.dr1997.com;
        index index.php index.html index.htm default.php default.htm default.html;
        root /www/wwwroot/frp.dr1997.com;

        #PROXY-START/
        location  ~* \.(gif|png|jpg|css|js|woff|woff2)$ {
            proxy_pass http://127.0.0.1:8880;
            proxy_set_header Host $host;
            proxy_set_header X-Real-IP $remote_addr;
            proxy_set_header X-Forwarded-For $proxy_add_x_forwarded_for;
            proxy_set_header REMOTE-HOST $remote_addr;
            expires 12h;
            }
        location / {
            proxy_pass http://127.0.0.1:8880;
            proxy_set_header Host $host;
            proxy_set_header X-Real-IP $remote_addr;
            proxy_set_header X-Forwarded-For $proxy_add_x_forwarded_for;
            proxy_set_header REMOTE-HOST $remote_addr;

            add_header X-Cache $upstream_cache_status;

            #Set Nginx Cache

                add_header Cache-Control no-cache;
        }

        #PROXY-END/

        access_log  /www/wwwlogs/frp.dr1997.com.log;
        error_log  /www/wwwlogs/frp.dr1997.com.error.log;
    }
反向代理 tcn
    upstream tcp {
        server 127.0.0.1:3306;
    }

    server {
        listen 3307;
        proxy_connect_timeout 8s;
        proxy_timeout 24h;
        proxy_pass tcp;
    }